Inventor is a software that allows you to draw an object in 3D. It allows you to show someone else your ideas for your product or building without having to create a scale model yourself, or having to tediously draw it from every point of view.

How to make this widget in Inventor
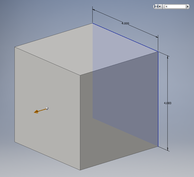
First, you are going to want to start a new part file. Then, click start a new sketch and select the x-y plane. Select the rectangle tool and draw a rectangle starting at 0,0 and going 4'' up and down

Next you are going to want to click "finish sketch." Then click extrude and have it go 4'' out.
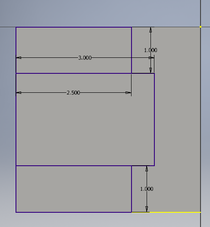
Then, start a new sketch by clicking start a new sketch and clicking the top of the cube. Make a rectangle starting from the top left corner and go 1" down and 2.5" to the right. Repeat this starting on the bottom left corner and going up instead of down. Then make a rectangle in between these 2 that goes right 3 in.
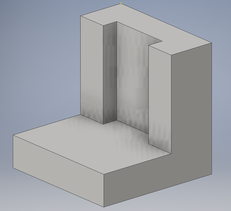
Then, finish the sketch and click extrude. Select all 3 rectangles by clicking them. Set it to go in direction 2 by clicking the rectangle with an arrow and selecting direction 2. Then have it go 3".
Start a new sketch on the bottom "seat" part of the part. Make a 1x1 square that is 1.5" from the top and 1" from the left. The dimension tool can be used to accomplish by clicking the 2 lines you want to set a distance between and then setting a distance. Next cut off the top and bottom left corners with 45-45-90 triangles using the line tool to draw them. The 2 legs of the triangles should be 1 in each.

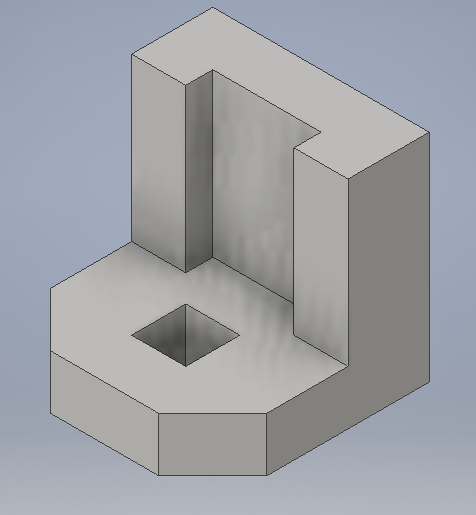
Finish the sketch and extrude all the shapes in direction 2 for at least 1". You should end up with the completed widget.